Objectives
Migrate an existing website and database hosted within a Web Hosting Manager (WHM) to a remote WHM host.
Prerequisites
- PuTTY (Optional)
- Ensure your remote server is able to communicate with your existing web server.
- Internet connection
Steps
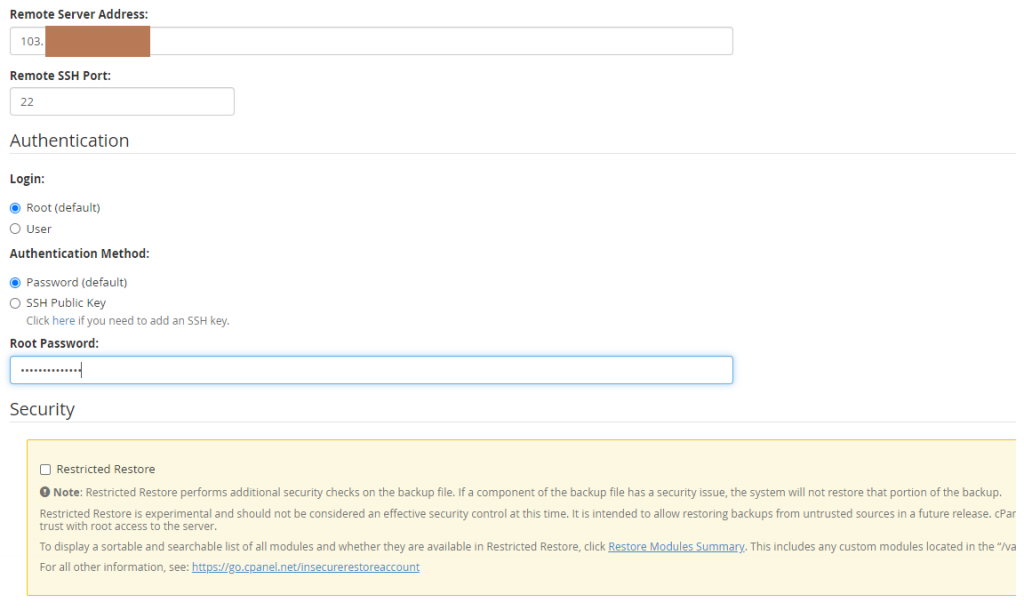
Step 1: Verify Connection
Before we begin the migration procedure, we need to ensure the our existing WHM host to able to communicate to our remote WHM host.
To do so, login to your WHM account, type transfer in the search bar.
Expand the Transfers category, select Transfer Tool.
Specify the required information and then select Scan Remote Server.
Step 2: Migrate Web Files
Select the cPanel account you wish to migrate and select Copy. This will begin the migration process. Process may take up to an hour depending on the amount of content contained within the domain.
Step 3: Backup Database
Access the console (or PuTTY) of your current database server.
Enter the following command to backup the database file.
mysqldump -u *username* -p *database_name* > *backup_name*.sql
Step 4: Migrate The Backup
Migrate the backup using a command called scp (Secure Copy) to the remote server’s public IP.
scp -P 2211 *backup_name*.sql [email protected]:/root/
Note: -P option is only used if you used a custom SSH port.
Step 5: Create New Database User
Access the new database server via Console or PuTTY
mysql
– Accesses the mysql shell
CREATE new_db;
– Creates a new database
use new_db;
– Selects the database
source *backup_name*.sql;
– Restores the backup into the selected database
grant all privileges on *.* to *username *@’%’ identified by *password *grant option;
– Grants all privileges to the current user (root).
flush privileges;
– Reloads the grant table in the mysql database enabling the changes to take effect.
exit;
– Exits the database shell
Step 6: Access The Website
To verify that your website is functional after the migration, on you local machine, run Notepad / Notepad ++ as an administrator.
Locate and open the hosts file (C:\Windows\System32\Drivers\etc\hosts).
Add the domain name along with the new public IP address.
For example: –
103.x.x.x new-example.com
Open a browser in incognito mode and access the website.