Objective
Understand how to download, install and use OpenVPN via pfSense.
Prerequisites
OpenVPN configured in the pfSense Web GUI.
Steps
Step 1: Download and Install OpenVPN
Access your pfSense Web GUI, then login with your credentials.
At the front page, scroll down until you see the OpenVPN Clients area and then search for your username.
Depending on your OS, you can select one of the following:
Inline Configuration:
For Android users, download either one of the configurations and import into your OpenVPN.
Bundled Configuration:
Choose this if your Windows have an existing OpenVPN. Download the archive and place the contents into your OpenVPN config file.
Current Windows Installer:
If your Windows does not have an existing OpenVPN, you may install according to the versions as shown in the selection. Then you may run the installation and it will automatically run the setup for you.
Step 2: Using OpenVPN
At your Start Menu, select OpenVPN GUI.
Note that there will not be a window popping out, your OpenVPN will run and you can find it at your bottom right corner task bar.
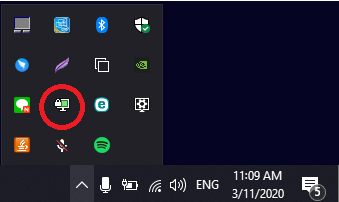
Then, right click the OpenVPN and select Connect.
Step 3: Changing OpenVPN Password
Access your pfSense Web GUI, then login with your credentials.
At the top of the page, navigate to System > User Manager.
From this page, you can change your password.