Objectives
To configure an Internet Protocol Security (IPSec) Virtual Private Network (VPN) between local firewall (Company A) and remote firewall (Company B).
Prerequisites
- companyA.localdomain – https://192.168.13.152/
- companyB.localdomain – https://192.168.13.175/
Steps
Task 1: Create IPSec Tunnel
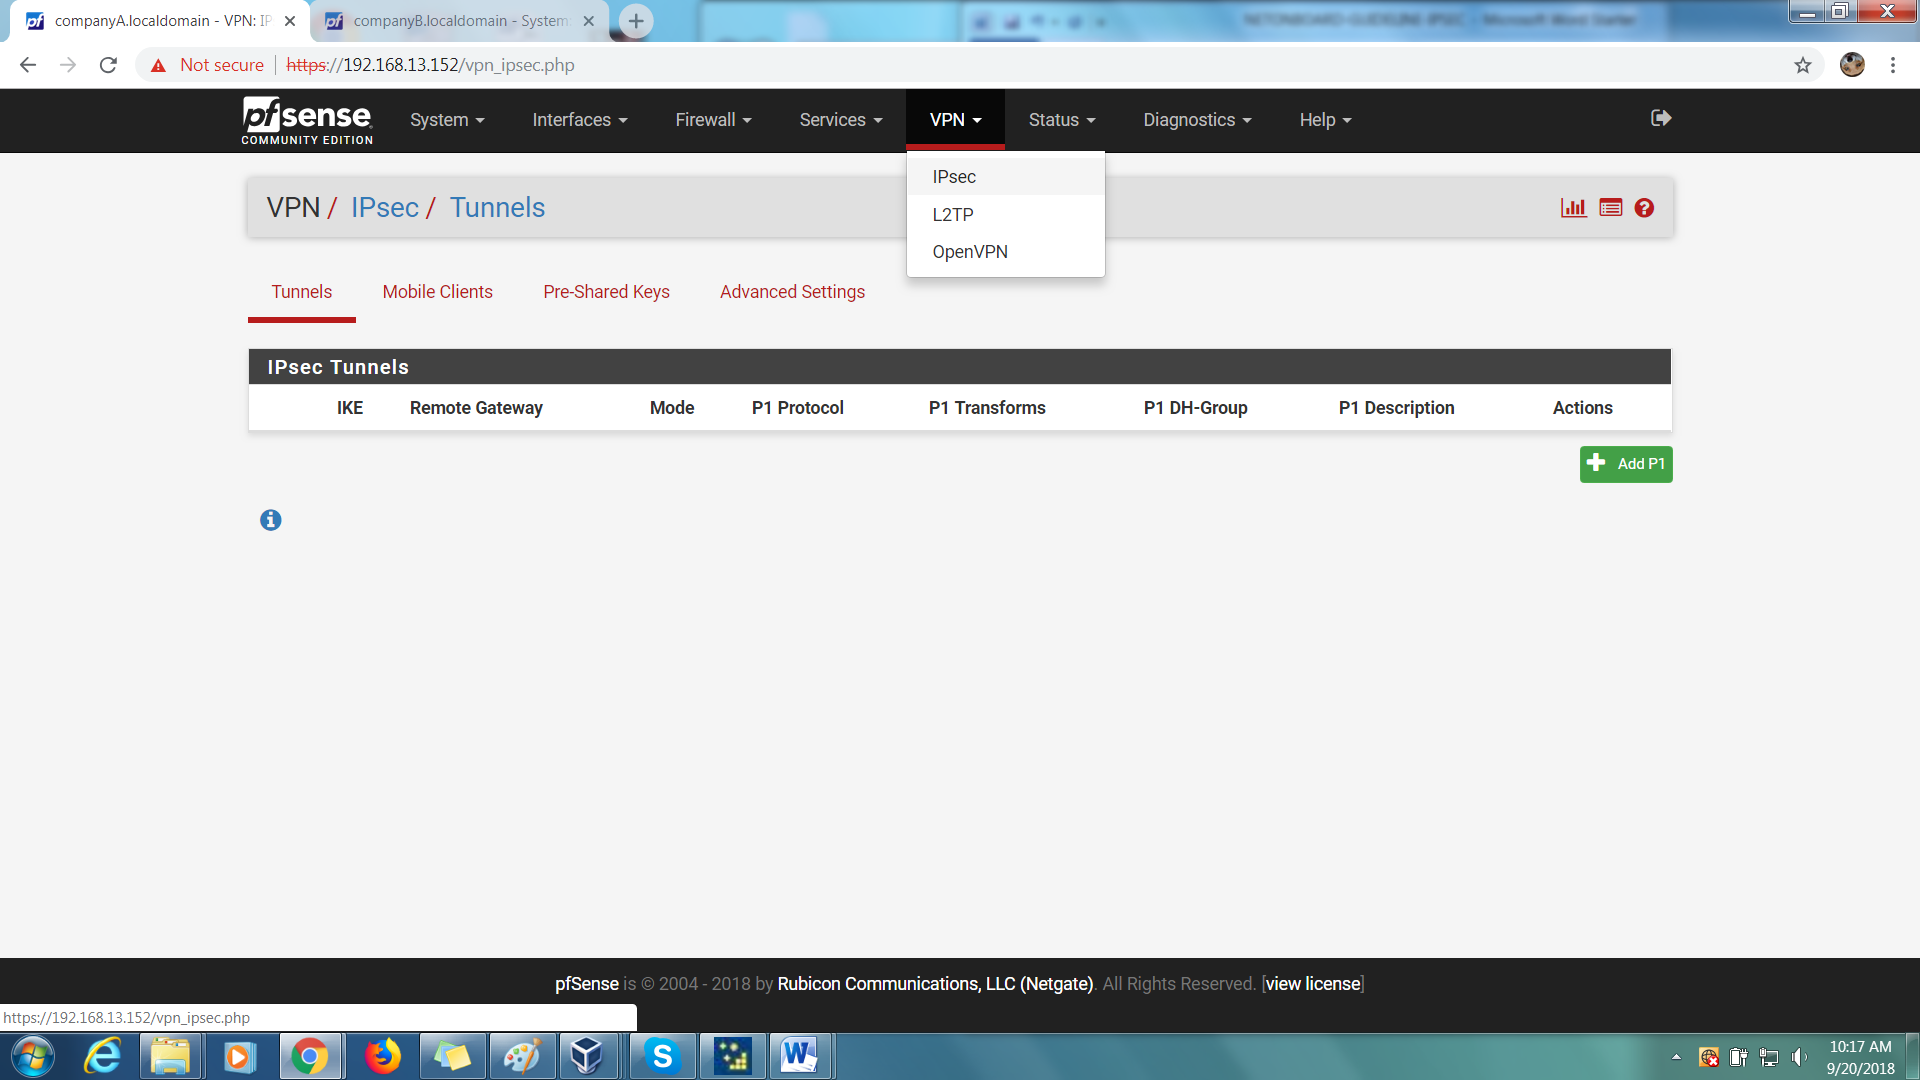
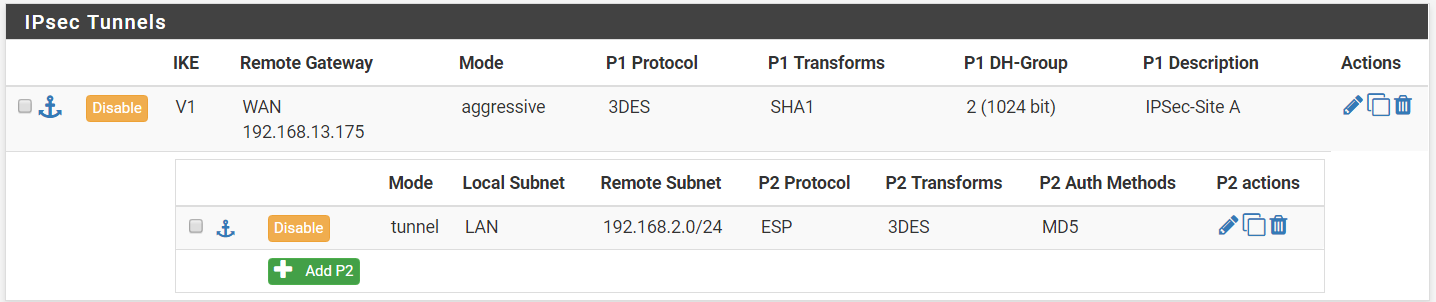
Step 1: On your first PfSense box (companyA.localdomain), go to VPN > IPSec > Tunnels.
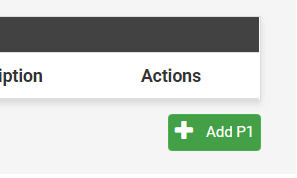
Step 2: On your right, click on the green ‘Add P1’ button to create a new Phase 1 tunnel.
Step 3: Under General Information,
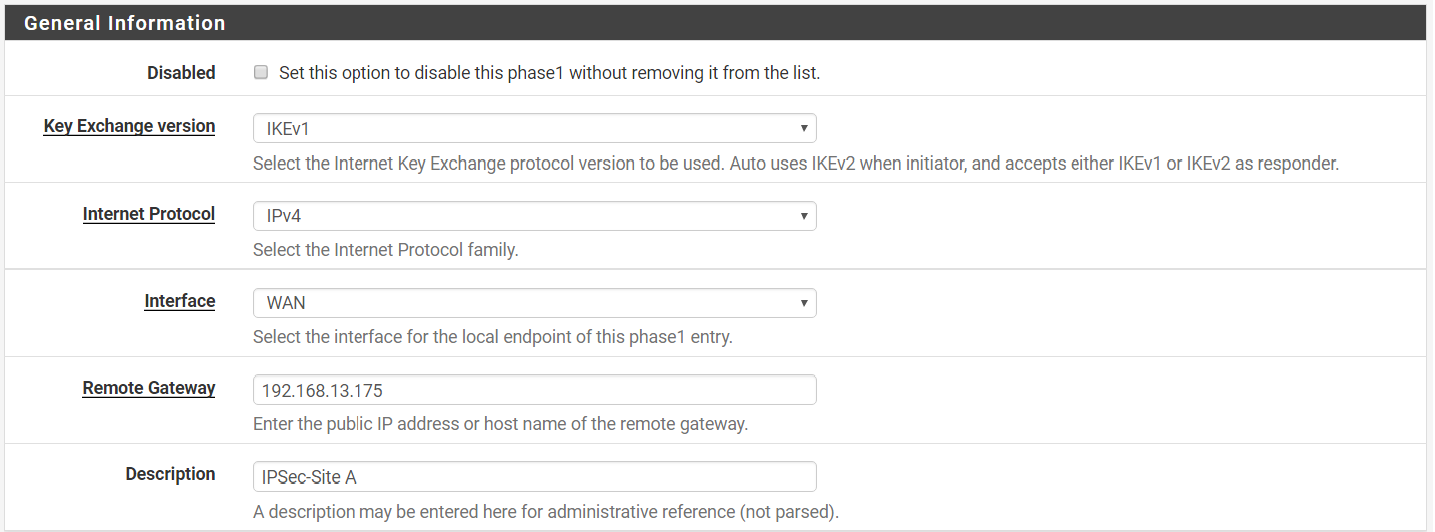
Key Exchange version > IKEv1
Internet Protocol > IPv4
Interface > WAN
Remote Gateway > 192.168.13.175 (WAN IP of remote firewall-Company B)
Description > IPSec-Site A
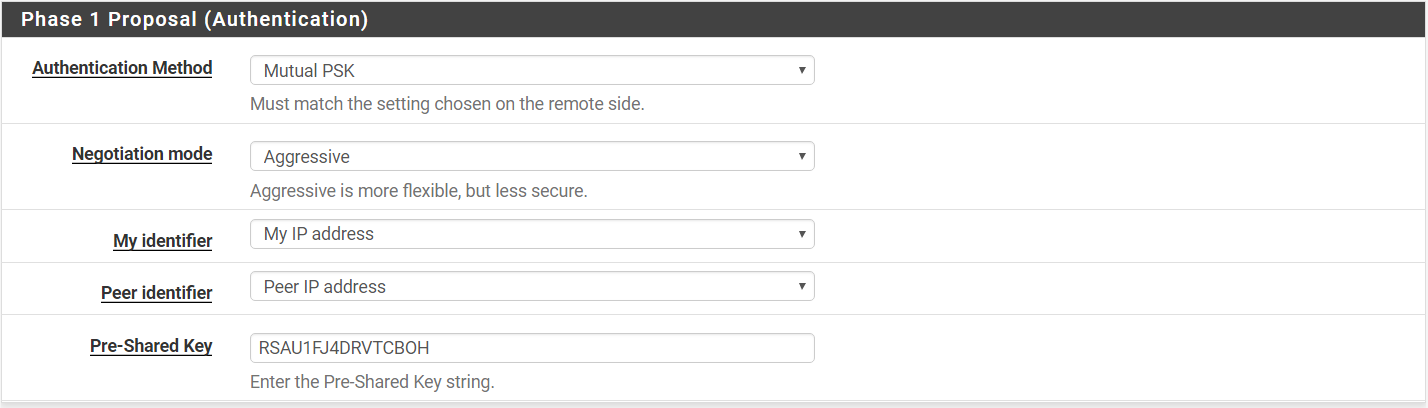
Step 4: Under Phase 1 Proposal (Authentication),
Authentication Method > Mutal PSK
Negotiation mode > Aggressive
My identifier > My IP Address
Peer Identifier > Peer IP Address
Pre-Shared Key > your_key_here
Step 5: Phase 1 Proposal (Encryption Algorithm)
Algorithm > 3DES
Hash > SHA1
DH Group > 2 (1024 bit)
Lifetime > 14400

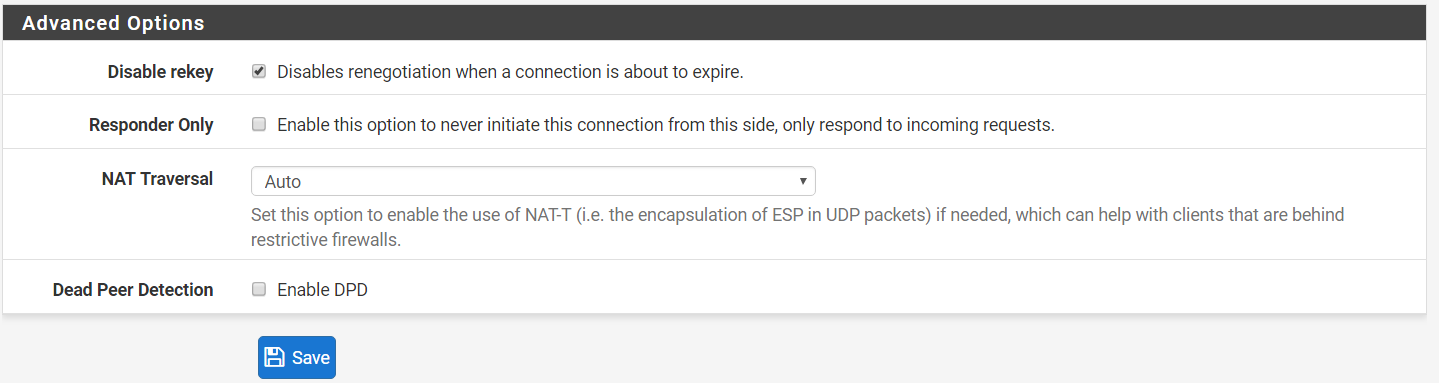
Step 6: Under Advanced Options,
Disable rekey > checked
Responder Only > Unchecked
NAT Traversal > Auto
Dead Peer Detection > Unchecked
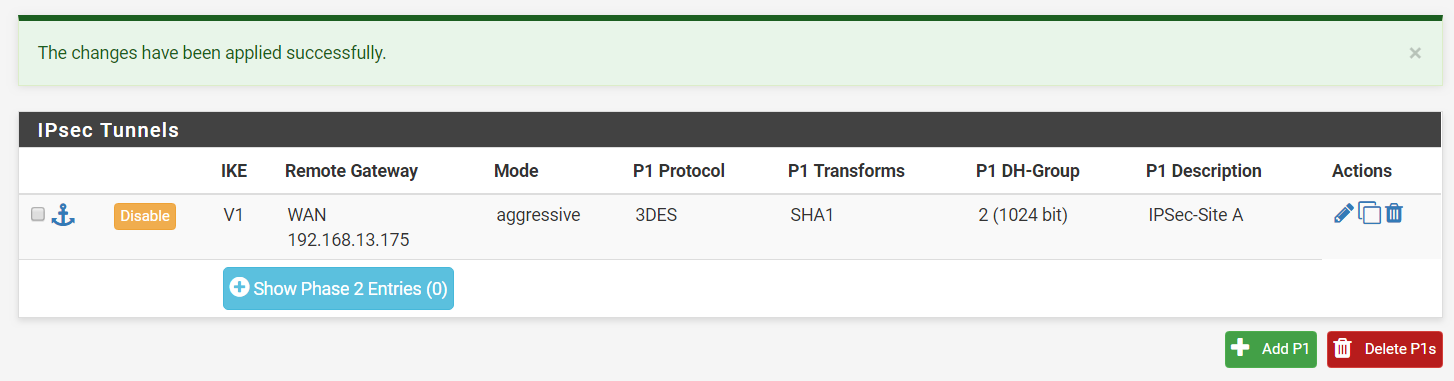
Step 7: Save your settings and Apply Changes. An entry should be added to the Tunnels table.
Step 8: On your newly-created tunnel, click on ‘Show Phase 2 Entries’ and then ‘Add P2’ to configure phase 2 of the IPSec configuration.

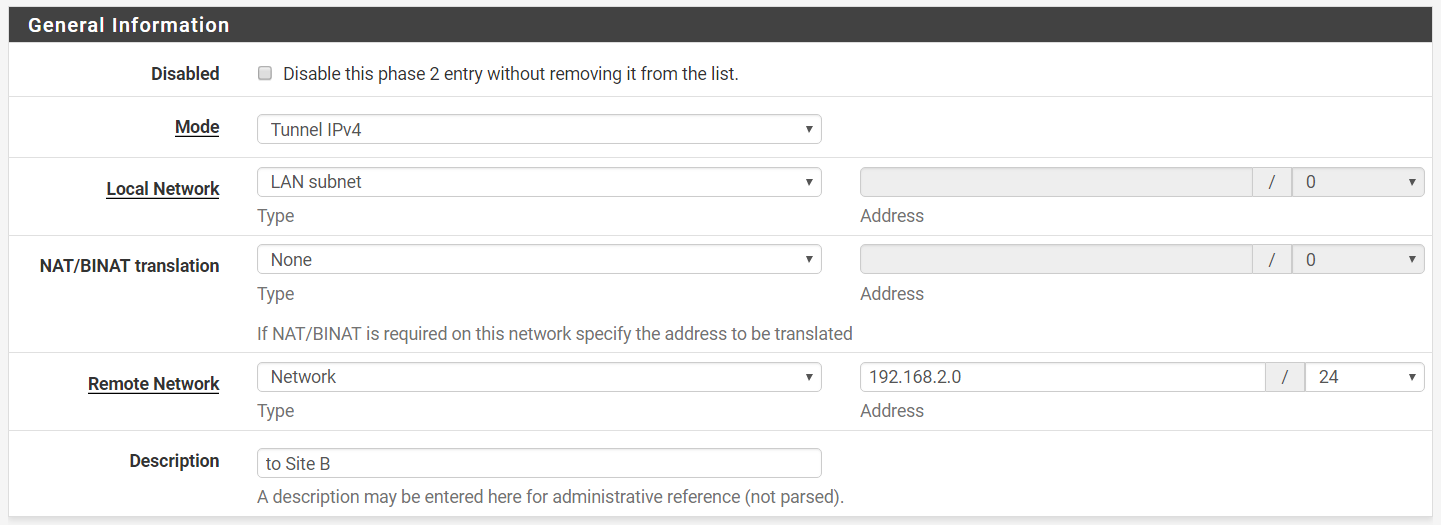
Step 9: Under General Information,
Mode > Tunnel IPv4
Local Network > LAN subnet
NAT/BINAT translation > None
Type > Network
Address > 192.168.2.0/24
Description > to Site B
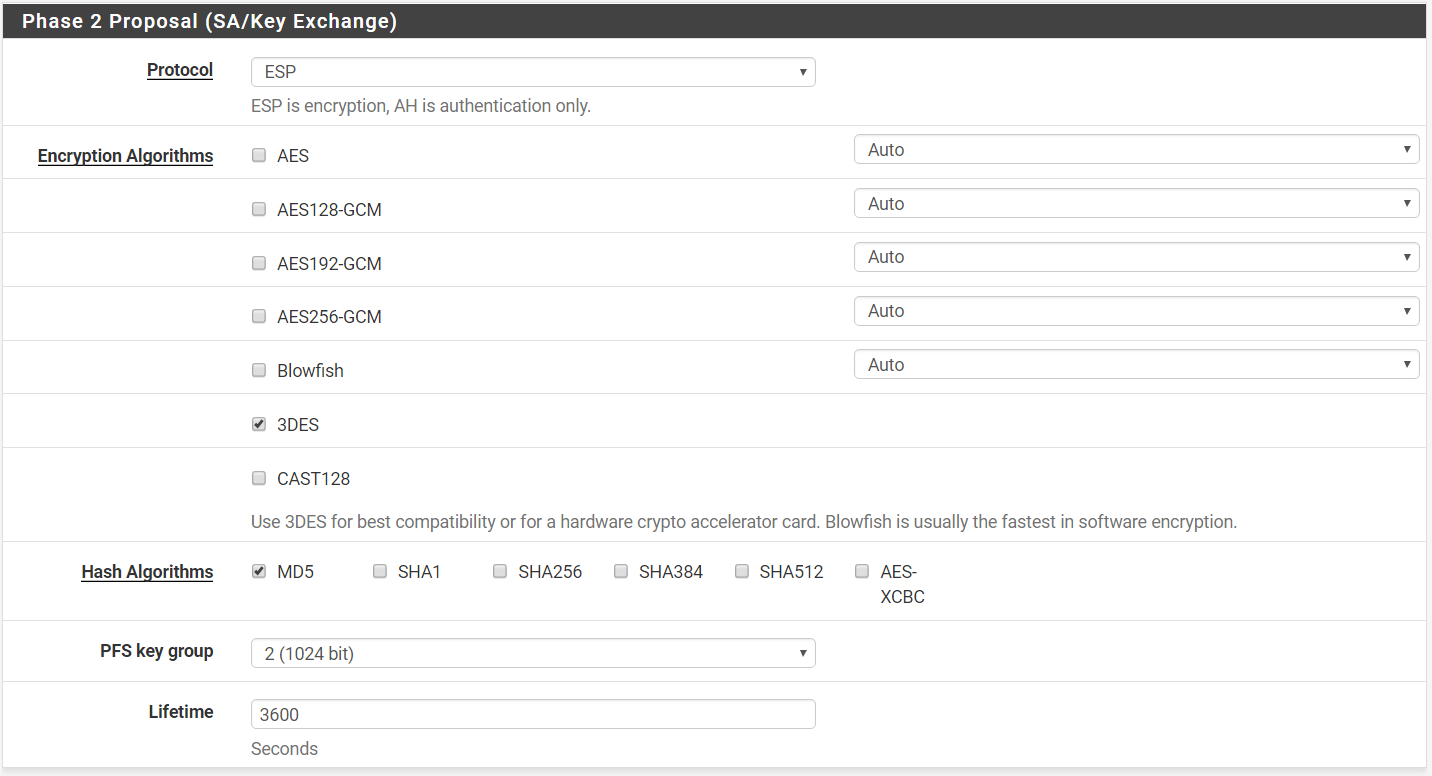
Step 10: Under Phase 2 Proposal (SA/Key Exchange)
Protocol > ESP
Only 3DES Checked
Hash Algorithm > Only MD5 Checked
PFS key group > 2 (1024 bit)
Lifetime > 3600
Step 11: Save your settings and Apply Changes. An phase 2 entry will be added under your P1 entry.
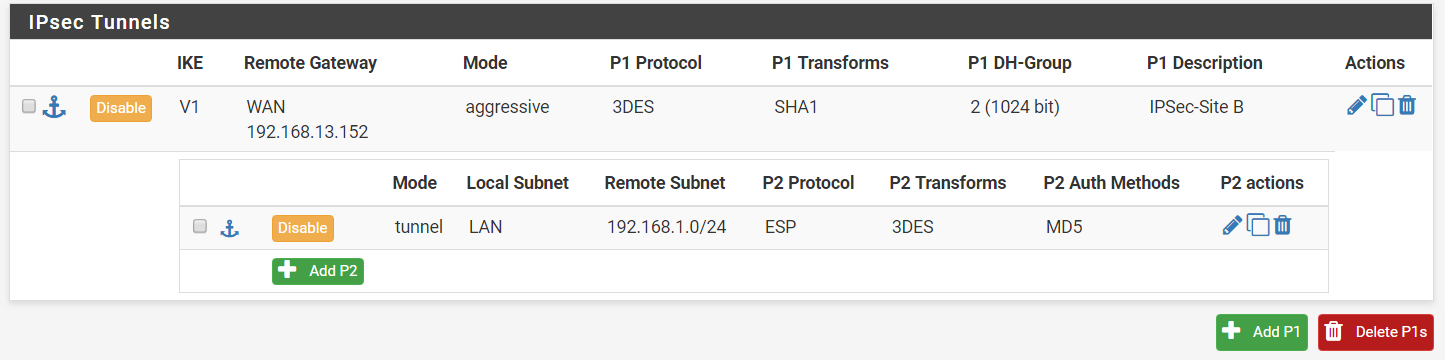
Step 12: Create the same IPSec tunnel for the remote firewall (companyB.localdomain). Please ensure that the authentication settings and pre-shared key are identical. This includes phase 2 settings.
Task 2: Add Firewall Rule
Step 1: On your first PFSense box (companyA.localdomain), go to Firewall > Rules > IPSec.
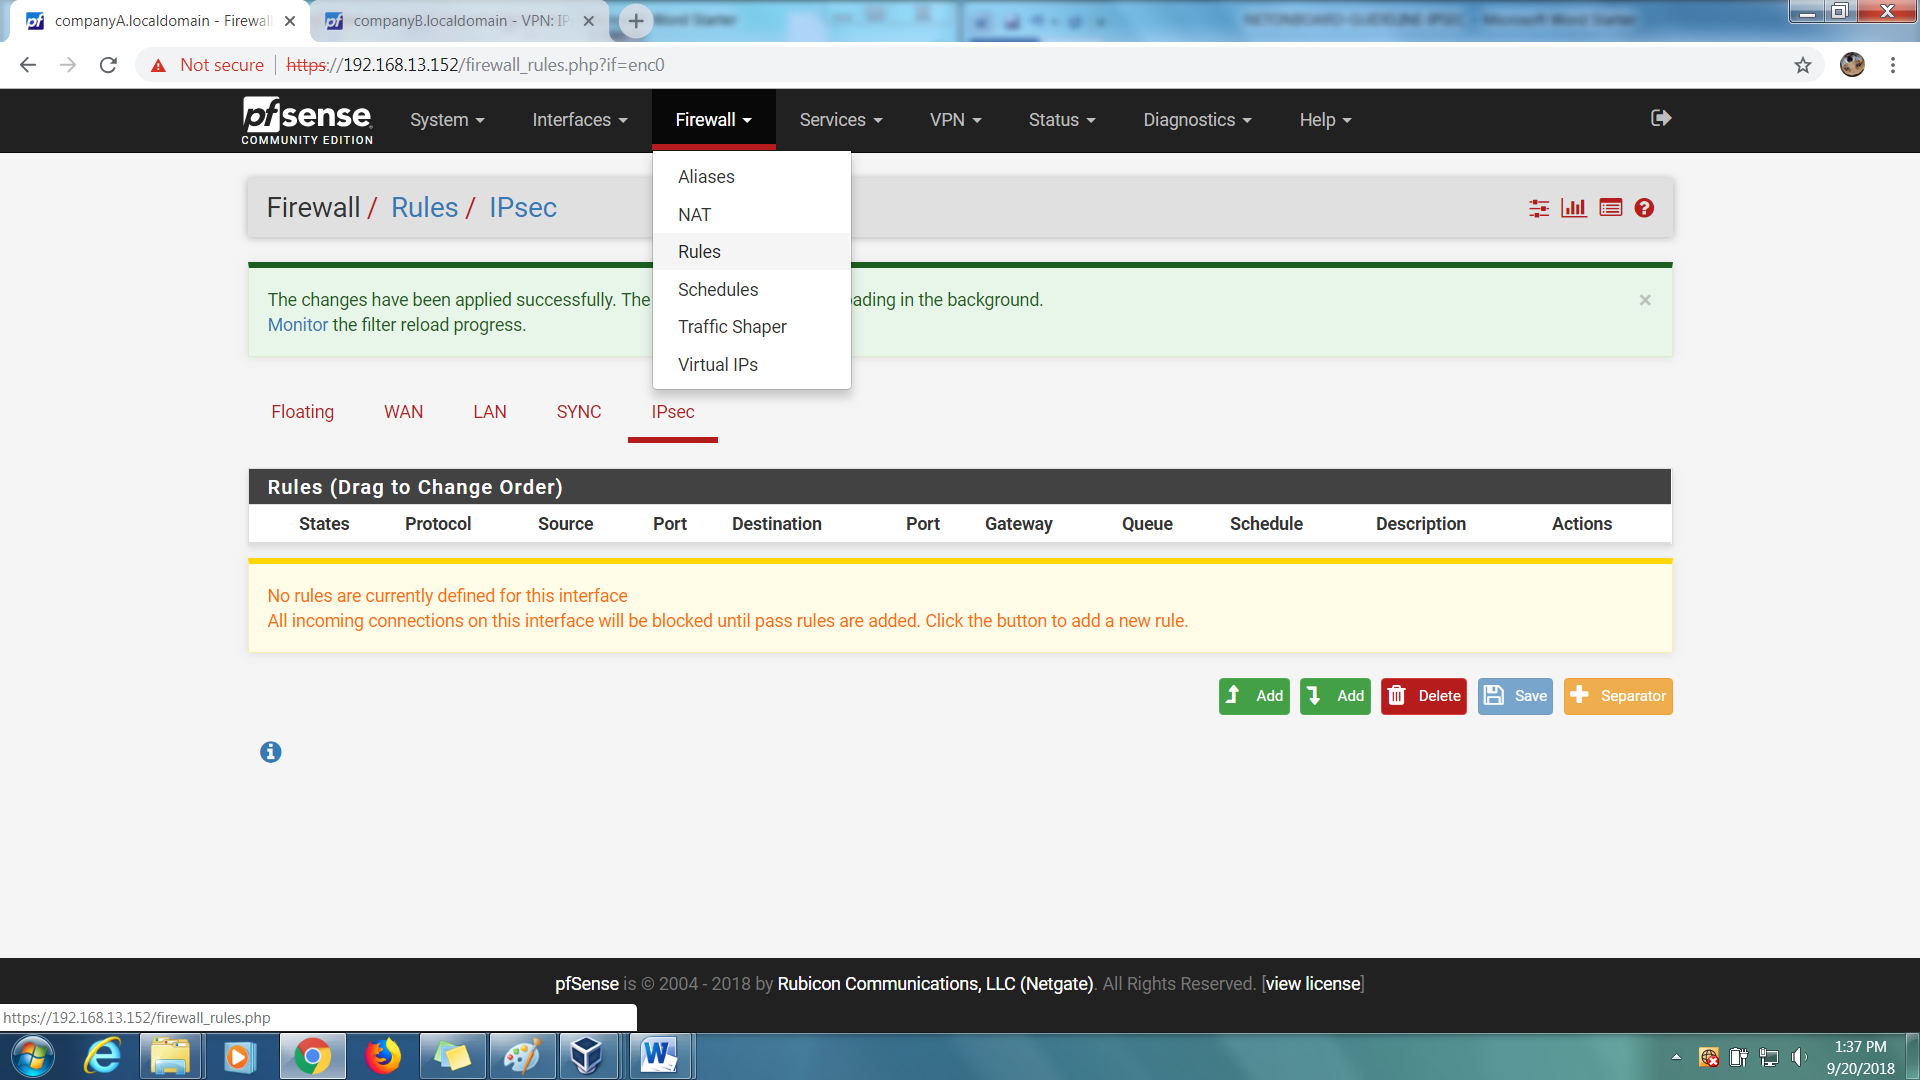
Step 2: Add an Allow All rule.
Step 3: Save and Apply Changes.

Step 4: Add the same rule for the remote firewall (companyB.localdomain).
Task 3: Activate and verify the configuration
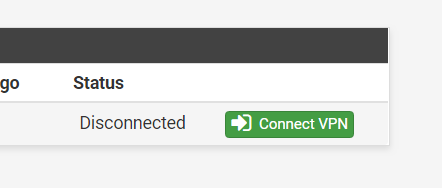
Step 1: On either firewall, go to Status > IPSec.
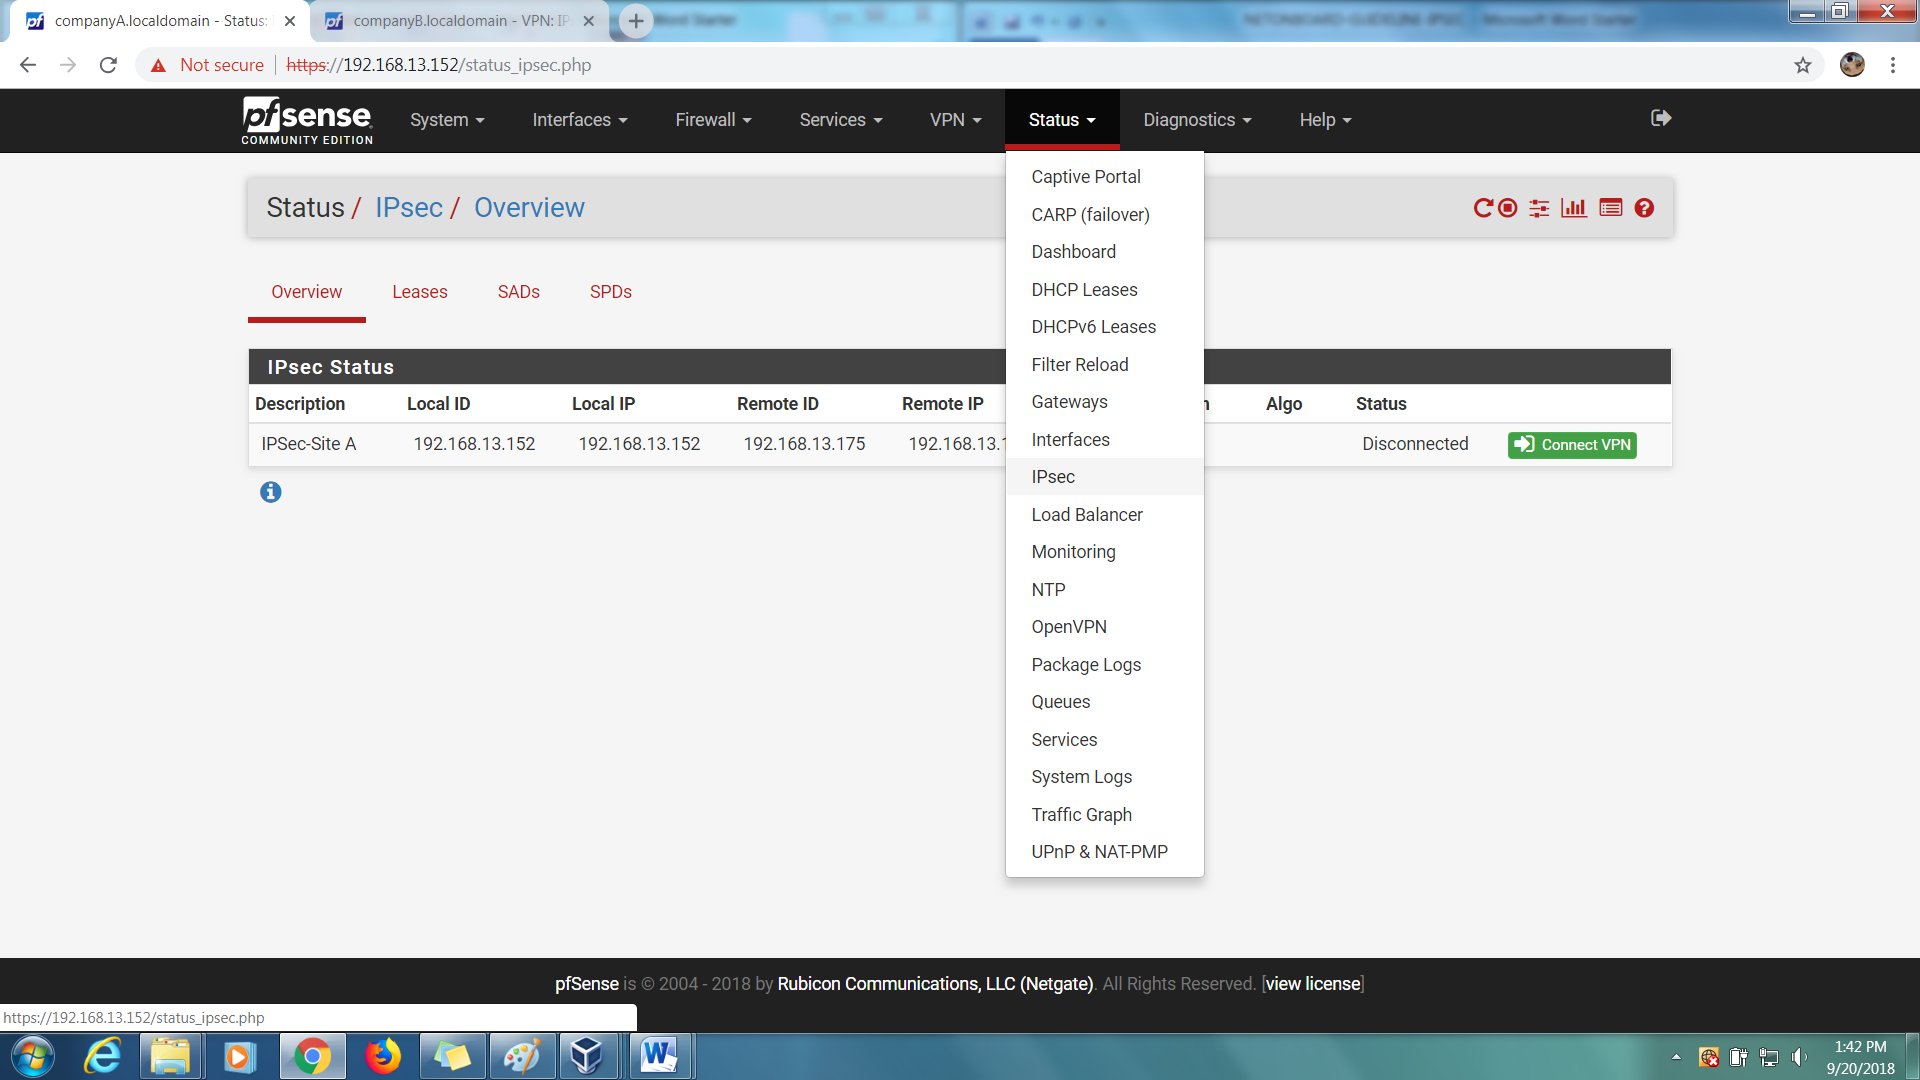
Step 2: You should be able to see one entry in a ‘Disconnected’ status.

Step 3: Click on ‘Connect VPN’ to begin the IPSec Tunnel connection.
Step 4: If successful, the connection should be established instantaneously.

Step 5: Test the connection by performing a ping test to the remote firewall LAN IP address.