Objectives
- Configure a scheduled scan for ESMC client machines to run an antivirus automatically and regularly.
- Generate scan report
Prerequisites
- ESET Security Management Center configured.
- Deployed ESET agents to client machines.
Steps
Step 1: Configure Scheduled Scan
Access your ESMC and login with your credentials.
From the ESMC sidebar, navigate to Policies > ESET Endpoints for Windows.
Then, select Antivirus – Balanced or Antivirus – Maximum Security (according to your preference) and press Edit.
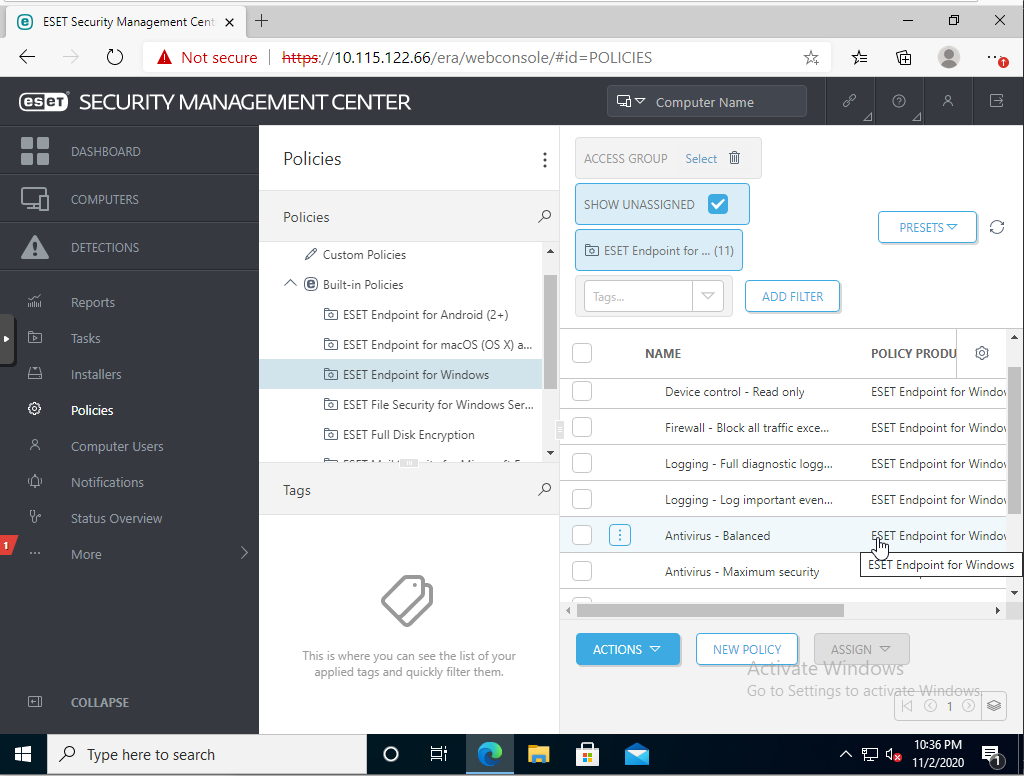
Then, navigate to Settings > Tools and select Scheduler, and press Edit.
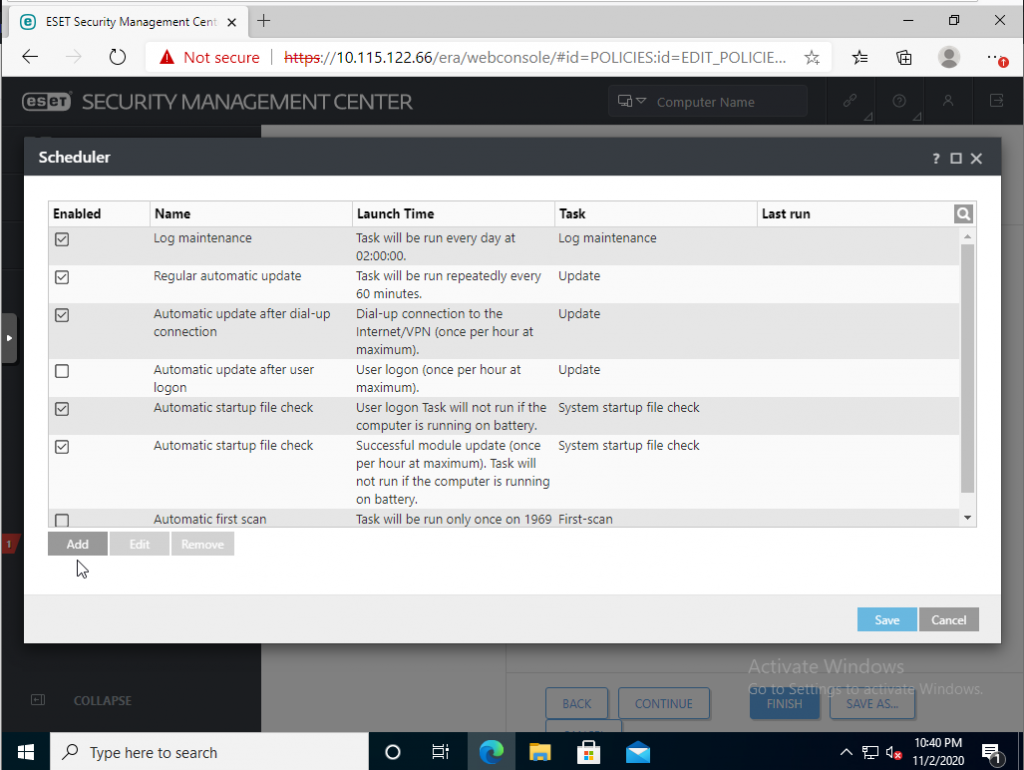
Click on Add and enter the following details.
Task Name: Your Task Name e.g. Scheduled Scan
Task Type: On-Demand Computer Scan
Enabled: Ticked
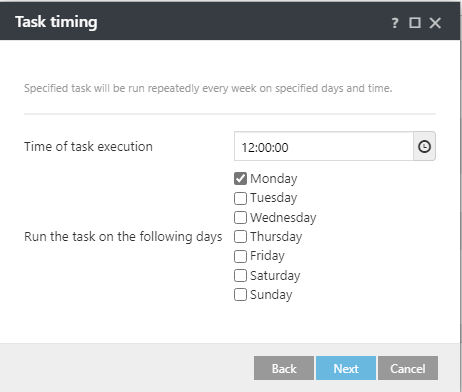
Then, press Next and select the designated schedule (e.g. Daily/Weekly).
Note: There are no options for a monthly scan. However, if you wish to perform a scan every 30 days, a workaround is to select Repeatedly and enter the interval as 43200 (minutes).

Here, you also have the option to have the client skip the test if it is running on battery power.
Then, set the time and day of execution (e.g. every Monday at 12 pm). Once you are finished, click on Next.
.
Next, set the action to perform if a task has been skipped. You can either skip the scheduled scan completely and scan at the next scheduled time, or scan as soon as possible.
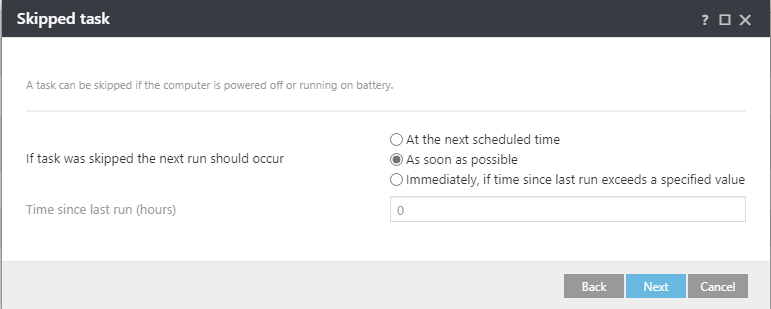
Once you have finished, click on Next. You will be prompted to the final page.
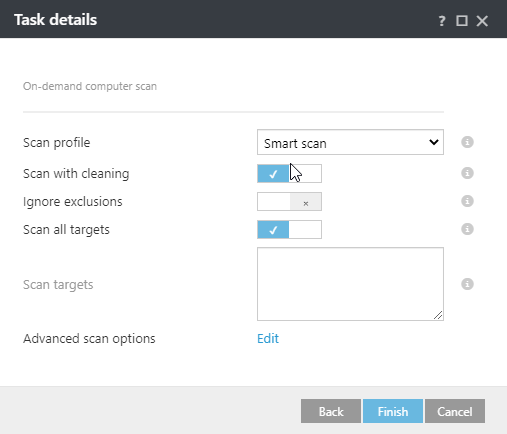
You can choose the scan profile (Smart Scan, In-Depth Scan, or Context Menu Scan) and set some options. Once you have finished, click on Finish.
Step 2: Add Policy Targets
From the ESMC sidebar, navigate to Policies > ESET Endpoints for Windows.
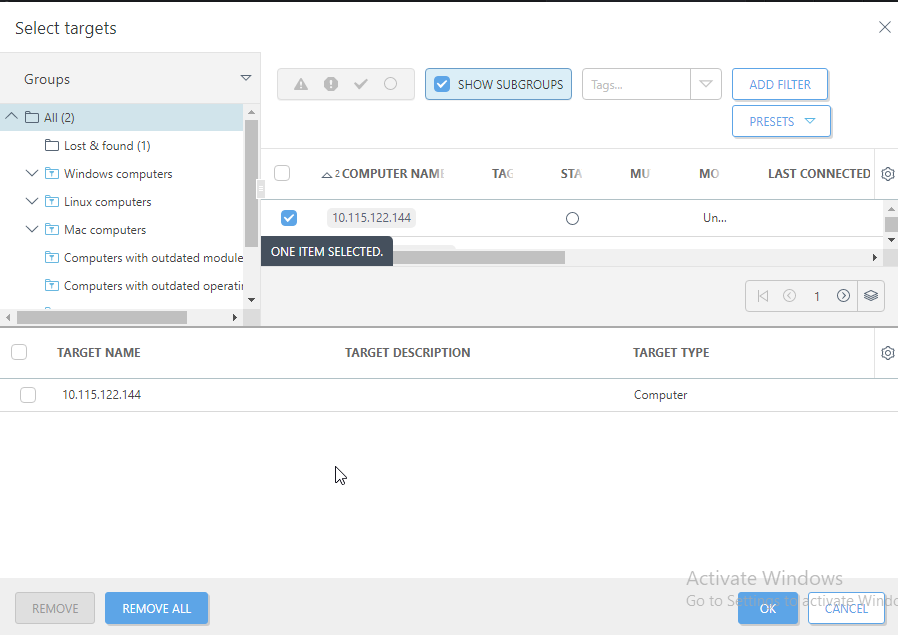
Then, select Antivirus – Balanced or Antivirus – Maximum Security (according to your preference) and press Assign Computers.
Tick the clients that you wish to include in the scheduled scan, and press OK.
Step 3: Generate Scan Report
In the ESMC sidebar, navigate to Reports
In the search bar, type “scan”, then select Scans in the last 30 days.